
As the timeless Tamil proverb, ‘Kattradhu Kai Mann Alavu, Kalladhadhu ulagalavu’ (கற்றது கைமண் அளவு, கல்லாதது உலகளவு) reminds us, “What one knows is only a handful, whereas the unknown is the size of the world.” While we frequently use laptops and PCs, many of us haven’t yet unlocked their full potential. This guide reveals 10 essential tips and tricks you might not know exist. Dive in and become a more tech-savvy user!
Effortless One-Click Screenshots on Your PC
Taking screenshots is a common task we perform on both smartphones and computers. Beyond personal use, screenshots are highly effective for work, especially when capturing important notes during meetings. While many users rely on the Snipping Tool or the ‘Windows Key + Shift + S’ shortcut on Windows 10, there’s an even quicker method.
Discover a simple, universal shortcut to capture your screen on any Windows PC or laptop: just press ‘Windows Key + PrtScr’. If this doesn’t work, your ‘fn’ key might be active; in that case, press ‘fn’ along with ‘Windows Key + PrtScr’.
By default, your captured screenshots are saved conveniently in the Pictures folder within ‘This PC’.
Reclaiming Storage: Deleting Temporary Files
Much like regularly clearing recent tabs on your smartphone, your PC also benefits from periodic clean-ups beyond simply closing applications from the task manager. This involves deleting temporary junk files that accumulate within your system. By running ‘%temp%’ and then ‘temp’, you’ll reveal a collection of temporary files that can be safely deleted. This process is recommended periodically, perhaps once a month or even weekly if your system has limited storage.
Please note that you might encounter errors when deleting certain files; simply ‘skip’ these instances to continue the cleanup.
How to Conceal Files and Folders on Your System
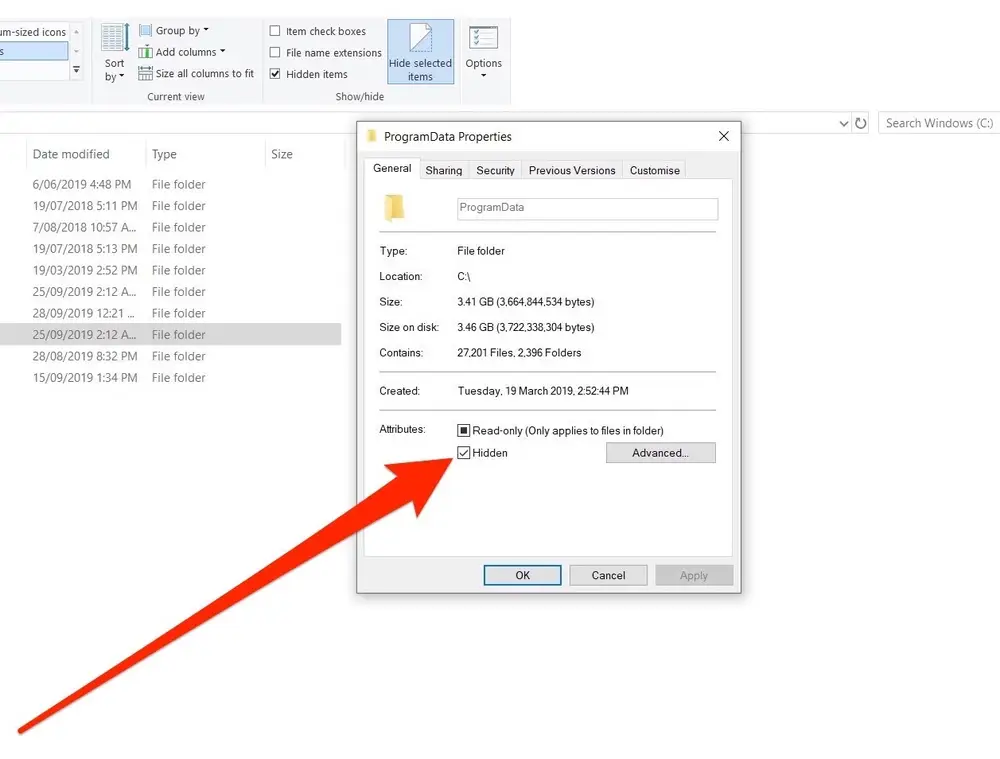
- Right-click the file or folder you wish to hide and select “Properties.”
- Check the “Hidden” box and click “Apply.” The selected file or folder will now be concealed.
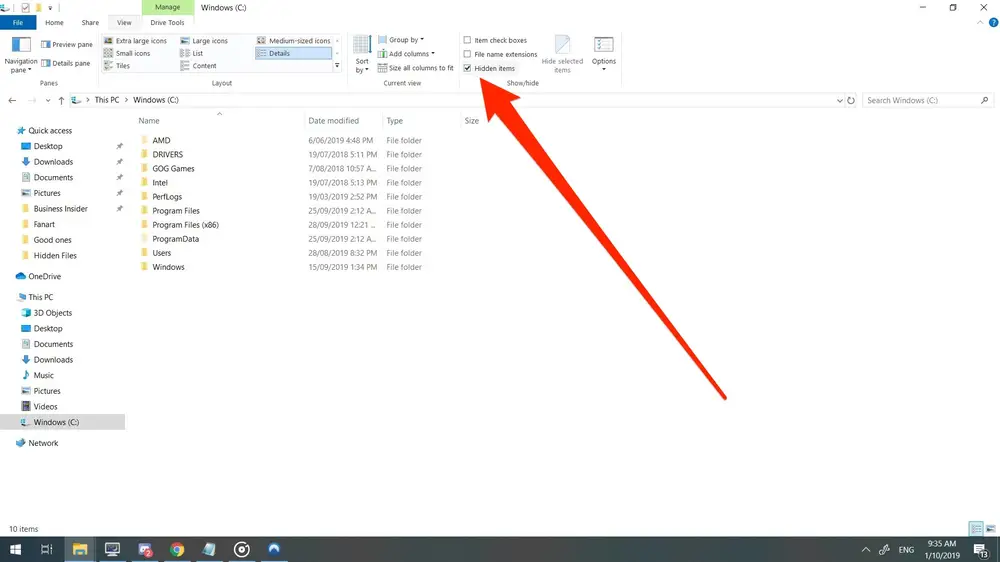
- To view your hidden files, navigate to that location and click “View” in the top toolbar.
- Select “Show Hidden Files.” Your previously hidden files/folders will reappear.
- After reviewing your hidden files, remember to uncheck “Show Hidden Files” in the ‘View’ section to re-hide them.
Optimizing Startup Speed for Faster Boot Times
Are you experiencing frustratingly long startup times after shutting down your computer? You might already be aware of how to manage startup applications. Each time you boot up your system, several applications may launch simultaneously, potentially slowing down or even freezing your computer. Windows often enables numerous apps to start during login that are simply not necessary.
To address this, go to ‘Settings’ and search for ‘Startup Apps’. Here, you’ll find a list of applications configured to launch every time you log into your system after a shutdown. You can disable unnecessary apps to significantly improve your boot speed.
Managing Your System’s Default Applications
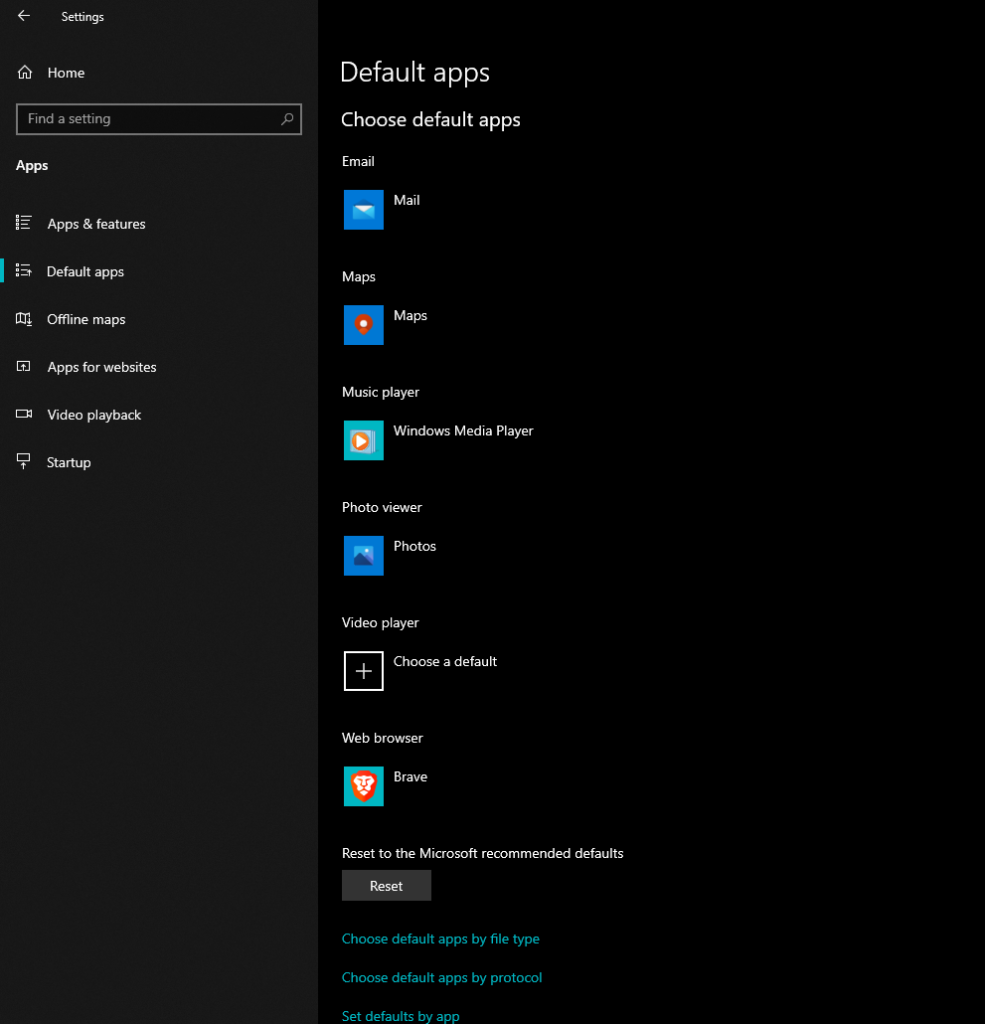
While you might be familiar with the concept of default applications, you might be unsure where to modify or change them. Default apps are simply the programs your system automatically uses to open specific file types or handle certain tasks, such as playing music, web browsing, or emailing.
To customize these settings, navigate to ‘Settings’ >> ‘Apps’ >> ‘Default Apps’. Here, you can easily adjust which applications open by default for various functions.
Securely Deleting Files Permanently
Here’s a simple yet crucial tip for every computer user. Instead of the two-step process of deleting files and then emptying the Recycle Bin, you can instantly delete files permanently with a single action. Simply select the files you wish to remove and press ‘Shift + Del’. This action will bypass the Recycle Bin and permanently delete the selected items. Be aware that once files are deleted this way, they cannot be retrieved.
Unlocking Advanced Features in Sticky Notes: Insights
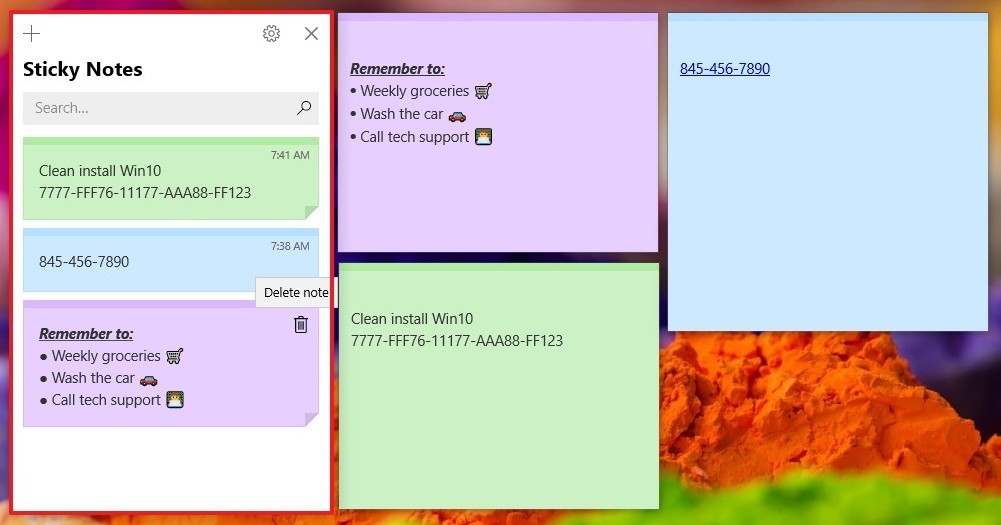
Sticky Notes are more than just a place to jot down quick reminders; they offer additional functionality. This handy Microsoft app is widely used for keeping track of tasks. By enabling ‘Insights’ in Sticky Notes, you can directly initiate emails and calls from within your notes.
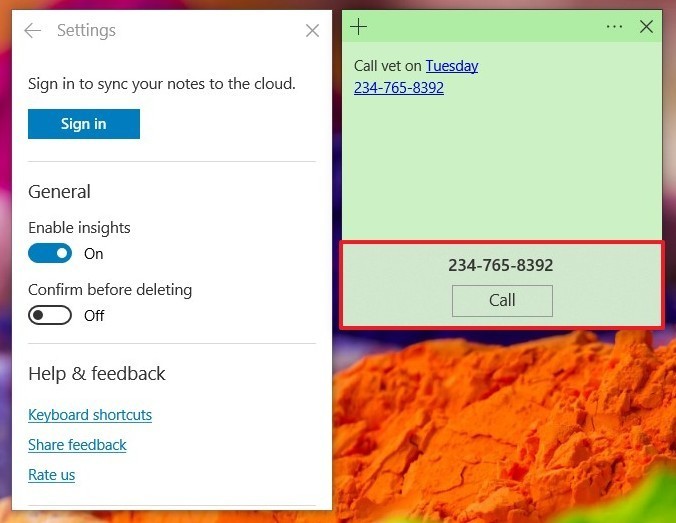
Sticky Notes doesn’t have dedicated ‘New Mail’ or ‘Call Log’ buttons. Instead, when you type an email address or a phone number, it automatically turns blue, similar to how it behaves in Word or Excel. Clicking on the highlighted email or number will prompt you to either send an email or make a call, respectively.
To activate this feature, open Sticky Notes and click on the ‘Menu’ (the three dots next to the close button). Select ‘Notes List’, which displays all your notes. At the top, you’ll find ‘Settings’. Click on ‘Settings’ and toggle ‘Enable Insights’ to the ‘On’ position. You will then see Insights in action within your notes.
Don’t Miss This: 10 Things You Didn’t Know About Your Windows 10
Boost Productivity with Virtual Desktops
Many users are unaware of this powerful Windows trick that significantly enhances productivity: creating virtual desktops. For individuals handling multiple tasks or projects with only one laptop or PC, virtual desktops allow you to create separate workspaces. Each desktop can host specific applications related to a particular task, keeping your primary desktop clutter-free and organized. This feature is a fantastic addition from Microsoft.
Creating virtual desktops is straightforward and can be done in two ways: using your mouse or a keyboard shortcut. To use the mouse, press ‘Windows Key + Tab’; you’ll see ‘New Desktop’ in the top left corner. Click this to open a new virtual desktop. You can repeat this to create as many desktops as needed. For instant creation, simply press ‘Windows Key + Ctrl + D’. To close a virtual desktop, use ‘Windows Key + Ctrl + F4’. Microsoft makes managing your workspace much easier.
Related Posts
Optimize Storage with Windows 10’s Storage Sense


Windows 10 often retains old temporary files that serve no purpose other than consuming valuable hard drive space. Fortunately, a built-in Windows 10 feature called Storage Sense addresses this issue by automatically deleting temporary files and clearing your Recycle Bin. This feature might not be enabled by default, so let’s explore how to activate and configure it to keep your hard drive clean and efficient.
Begin by navigating to ‘Settings‘ > ‘System‘ > ‘Storage‘, or use the Windows keyboard shortcut ‘Windows key + Q’ and then type: ‘storage’. The Storage Sense option is clearly visible; simply toggle the switch to enable it.
To fine-tune Storage Sense settings, click the “Configure Storage Sense or run it now” link.
In most scenarios, the default settings are perfectly adequate. The Temporary Files option is automatically checked to delete temporary files that applications are no longer using. You can adjust the frequency for deleting files in your Recycle Bin to every day, two weeks, month, 60 days, or choose ‘Never’.
If you prefer to initiate a cleanup manually, you can click on the “Free up space now” link (indicated by the red box below) on the Storage page within Settings.
Beyond Basic Math: Calculator for Unit Conversions
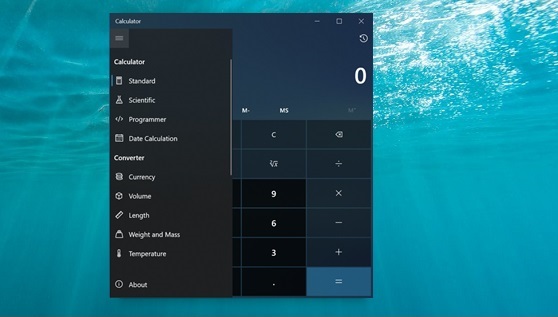
If you’ve ever needed to convert currencies, measurements, time zones, speed, weights, or other units, you’ve likely turned to the web, Google, or Siri for assistance. However, did you know that the Windows 10 calculator application can perform all these conversions natively? Simply click the hamburger menu (three horizontal lines) at the top left of the app and select the type of conversion you wish to perform. It’s incredibly easy and takes only a few seconds.
We welcome your insights! Share any additional tips or tricks you have in the comments below.
Join our community by subscribing to our Weekly Newsletter to stay updated on the latest AI updates and technologies, including the tips and how-to guides. (Also, follow us on Instagram (@inner_detail) for more updates in your feed).
(For more such interesting informational, technology and innovation stuffs, keep reading The Inner Detail).