

Many powerful features within Microsoft Word often go unnoticed, yet they can significantly streamline your workflow.
If you missed the initial installment, be sure to explore Part 1 here for more essential Microsoft Word tips.
How to Quickly Extract All Images from a Word Document
When your Word document contains numerous images that you need to save as individual, accessible image files, this straightforward method allows you to instantly extract them all from your Word document.
Follow these simple steps to save images from Word:
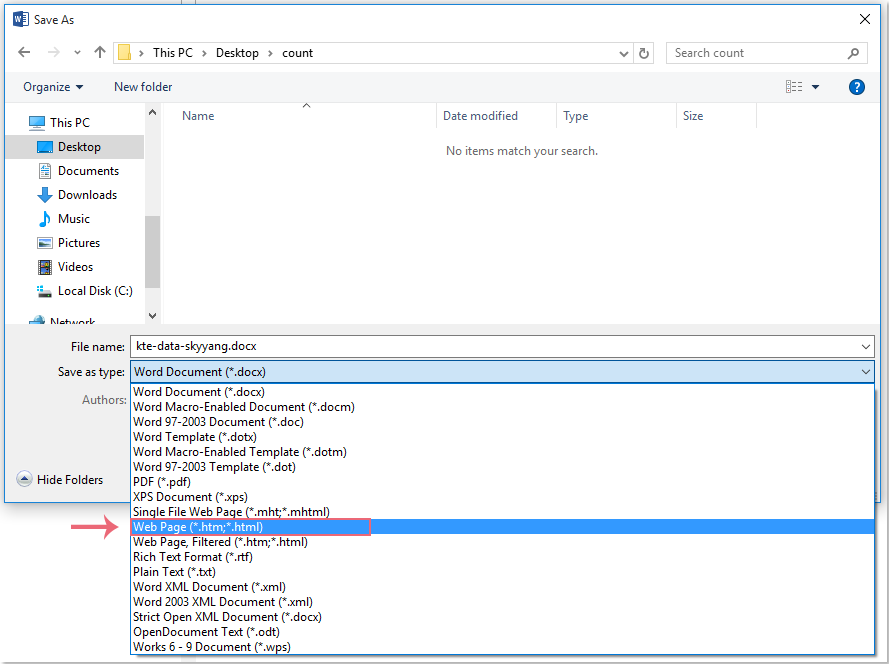
- Open the document containing the images you wish to extract. Navigate to File > Save As. In the Save As dialogue box, select your desired saving location. From the Save as type dropdown, choose the Web Page (*.htm;*.html) option.
- Click the Save button. Then, browse to the folder where you saved the new file. You will find a .htm file and a new folder created with the same file name.
- Open this newly created folder to access all the extracted images.
Enable AutoSave for Microsoft Word Documents
Have you ever spent considerable time typing in Microsoft Word, only to lose all your progress due to an accidental closure or a power outage? Such occurrences can be frustrating and costly in terms of lost effort.
Fortunately, Microsoft Word includes an invaluable ‘AutoSave’ feature that everyone should utilize. By enabling this beneficial option, your document can be saved automatically every minute as you work, minimizing data loss risks.
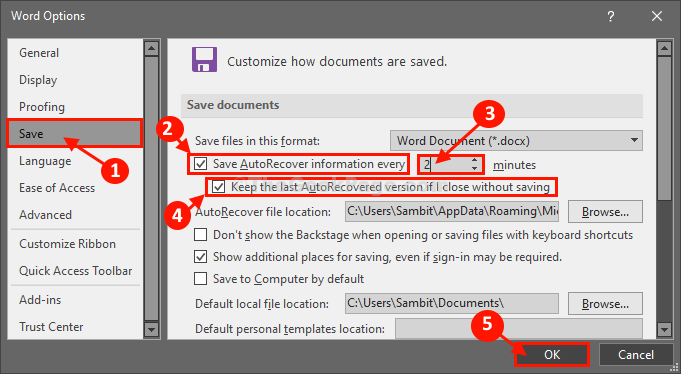
- In Word, navigate to the File menu, then select Options, and finally, Save.
- Within this section, ensure the “Save AutoRecover info” checkbox is marked. The default interval is often 10 minutes; for maximum protection against system failures, consider reducing this to one minute.
Additionally, remember that you can always perform a quick manual save by pressing ‘Ctrl+S’ on Windows or ‘Command+S’ on MacOS.
Integrate a Calculator Directly into Microsoft Word
Discover a lesser-known trick: the ability to integrate a calculator directly within Microsoft Word. While working on a document, you might occasionally need to perform quick calculations. Instead of switching to a separate calculator application, imagine getting instant answers right inside your Word document. This handy feature makes it possible.
- Right-click on the toolbar at the top of your screen, then select Customize Toolbars and Menus.
- Click on the Commands tab.
- On the left side of the screen, select Tools.
- On the right side, scroll down or search until you locate Tools Calculate.
- Drag this item directly onto your toolbar for easy access.
Watch the video to understand it better!
Mastering Quick Parts for Reusable Content in Word
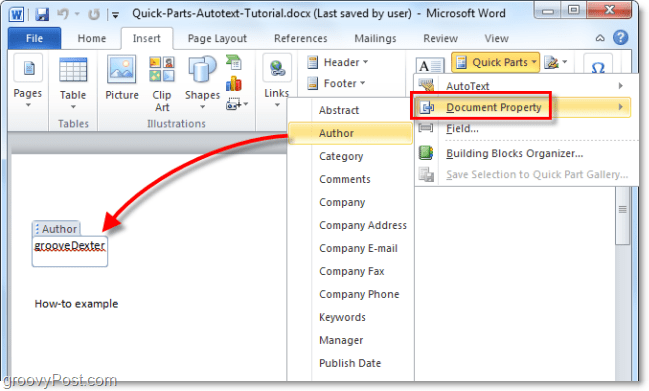
The Quick Part Gallery in Microsoft Word empowers users to create, store, and efficiently reuse various content elements. This includes AutoText, essential document properties like title and author, and custom fields. These versatile, reusable content blocks are also known as building blocks. AutoText, a frequently used building block type, is ideal for storing both text and graphics. The Building Blocks Organizer provides a centralized location to easily find or modify any existing building block.
- Select the specific phrase, sentence, or any other content portion within your document that you wish to save to the Quick Parts gallery.
- Go to the Insert tab, locate the Text group, click Quick Parts, and then choose Save Selection to Quick Part Gallery. Here, you can rename the entry and add a descriptive note if desired, then click OK.
- To insert a saved Quick Part, place your cursor at the desired location in your document.
- Return to the Insert tab, find the Text group, click Quick Parts, and then simply select the saved sentence, phrase, or content block you wish to reuse.
Enhance Microsoft Word Functionality with Add-ins
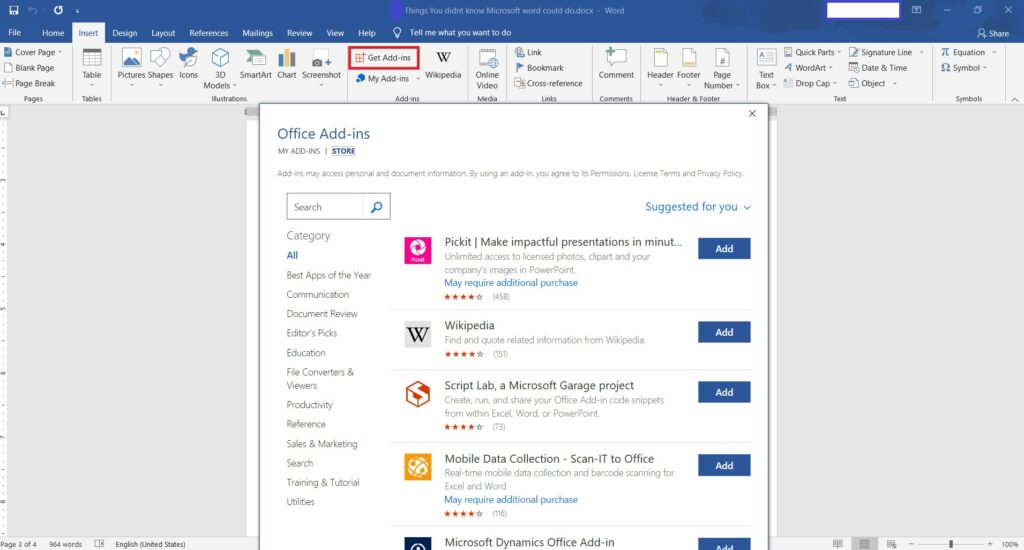
Microsoft Word extends beyond a standalone application, offering robust capabilities through the integration of various useful add-ins designed to enhance your workflow. To access the available add-ins, navigate to the Insert tab and click Get Add-ins. A new window will appear, allowing you to browse, search, and select your preferred add-ins to customize your Word experience.
Embed Various File Types Directly into Your Word Document
Beyond embedding images, clip art, and charts, Microsoft Word allows you to insert a wide range of file types directly into your .docx document, including PDFs, PowerPoint presentations, and more. To utilize this feature:
- Open the Insert tab.
- In the Text group, select Object.
- Choose the specific file you wish to embed into your document.
Leverage Voice Dictation for Hands-Free Typing in Word
Voice dictation in Microsoft Word transforms your spoken words into text, eliminating the need for manual typing. This speech-to-text feature is not only convenient for moments of “laziness” but can also significantly boost your productivity and save valuable time.
To begin, open a new document, navigate to the Home tab, and locate the Dictate option. Click the Dictate button and wait for it to activate, indicating it’s ready to listen.
Start speaking, and your words will appear as text on the screen. You can dictate punctuation by simply speaking it aloud (e.g., “period,” “comma”). Correct mistakes using commands like “undo,” “delete,” “delete last XX words,” or “delete that.” Additionally, formatting commands such as “bold,” “italics,” and “underline” are also recognized.
For more insightful tech tips, delve into: 10 Essential Windows 10 Features You Might Not Know About!
According to Microsoft, this dictation feature is compatible with MacOS, Windows 10, iOS, and Android platforms, provided you have an active Microsoft 365 subscription. It is important to note that this functionality is not available in standalone Office versions, such as Office 2019.
Secure and Protect Your Microsoft Word Documents
- Begin by opening the Microsoft Word document you wish to secure.
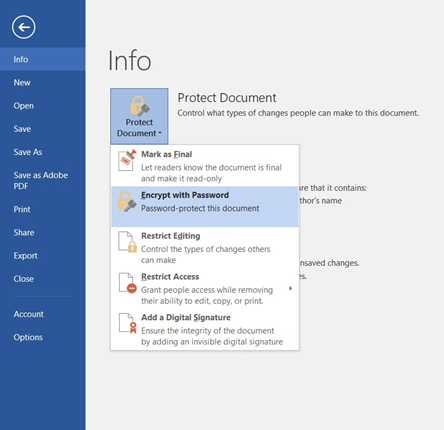
- Click the File menu, choose the Info tab, and then select the Protect Document button.
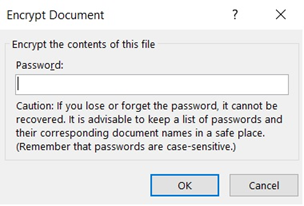
- Select Encrypt with Password. Enter your desired password, click OK, and then confirm it.
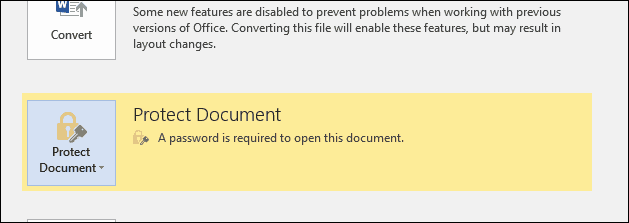
- Microsoft Word will now confirm that the document is protected. Subsequently, each time you attempt to open this document, you will be prompted to enter your password before gaining access to its content.
For more valuable Microsoft Word insights and features, be sure to explore: Discover Additional Microsoft Word Features!
Join our community by subscribing to our Weekly Newsletter to stay updated on the latest AI updates and technologies, including the tips and how-to guides. (Also, follow us on Instagram (@inner_detail) for more updates in your feed).
(For more such interesting informational, technology and innovation stuffs, keep reading The Inner Detail).